

This is my absolute favorite blog subject! I love when we are able to tool around the rig, personalize it, and make upgrades. Honestly, I love anytime we can be in the rig during the school year but blogging about it is a huge bonus. For this blog, I am going to talk about upgrades we did in the bathroom, the kitchen island, and under the TV storage.
We created an RV tour video on our YouTube channel and I blogged about our upgrades in April 2019. You can find the blog by clicking here. But let’s talk about what we have done since April. The links are also at the end of this blog.
Easy Upgrade: Adding a Shelf = New Liquor Cabinet

Under the TV Storage Before Under the TV Storage After
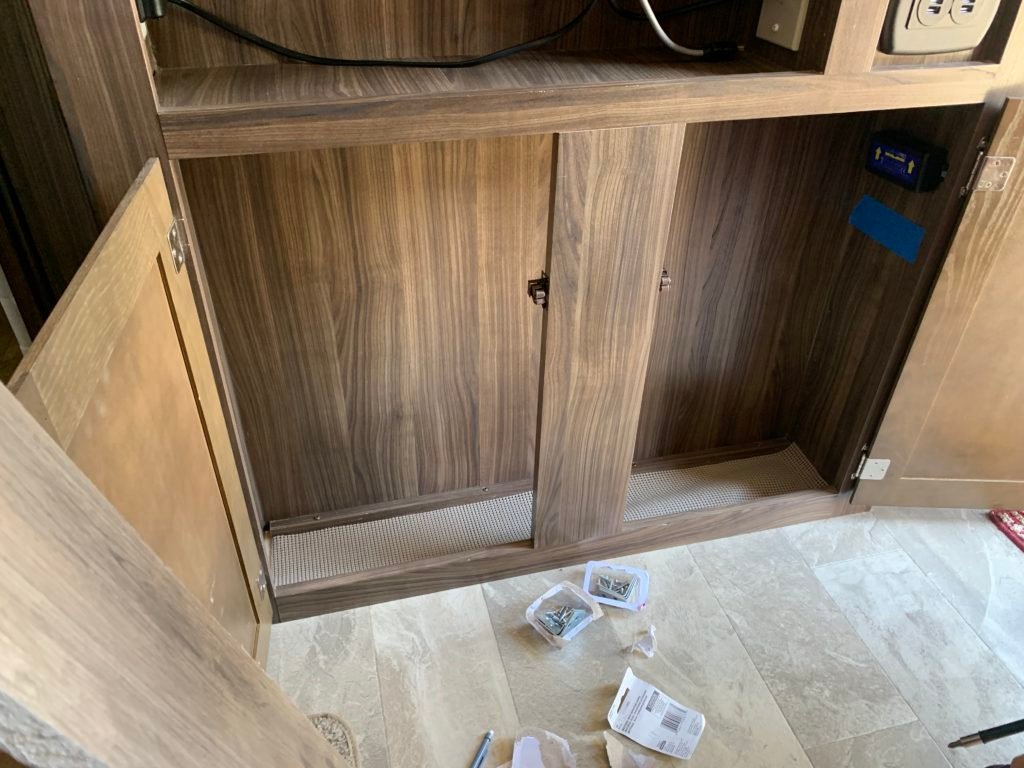
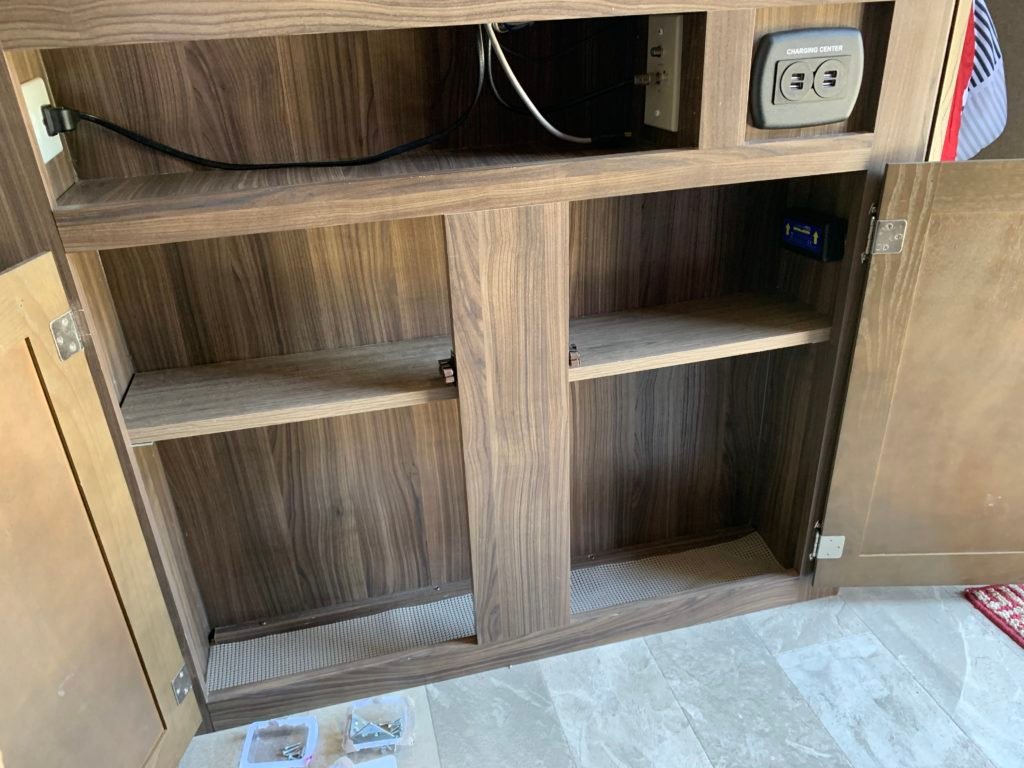
This may not seem like much but who needs a shelf that is this tall? And why in the world wasn’t there a shelf? I could ponder those questions or we can fix the problem. We found the wood at Lowe’s and were thrilled when it matched so well (when does that happen?). Brian installed the shelf using L brackets on the sides and on the front middle. The L brackets are in the framing so it’s not going anywhere. This is going to be our liquor/soda cabinet on the bottom shelf and camera equipment on the top shelf. To protect the bottles when moving we have invested in bottle wraps as seen below.
Creative Way to Add Countertop Space


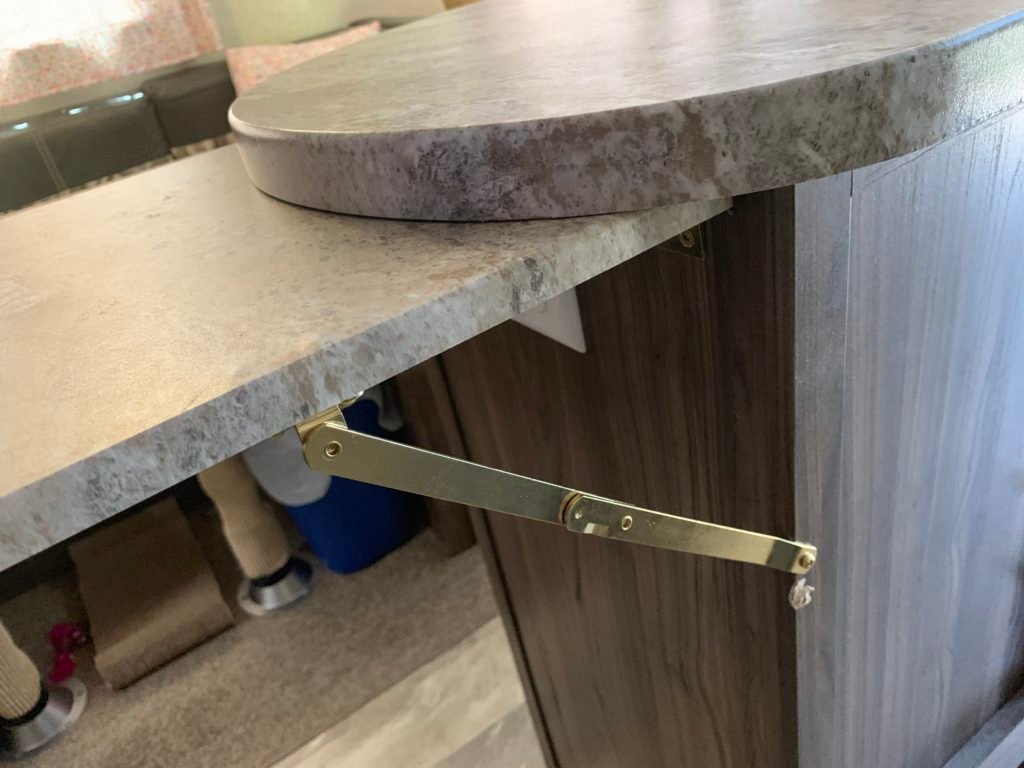
Every rig comes with counter covers for the sink. We never used them. I tried but they were always in my way when I needed in the sink. I have tried using one side but not the other, still didn’t work. The photos don’t show it but I use a roll-up sink draining board and it’s perfect for resting things while we are cooking and for dishes as they dry.
Since counter space is at a premium, we had to get creative. It took some time to make this commitment because it is relatively permanent but we decided to use the sink covers as collapsable pull-down counters. They are screwed into the island with a collapsible arm bracket. Result: They are absolutely amazing!!
Upgrading the Bathroom Sink & Faucet
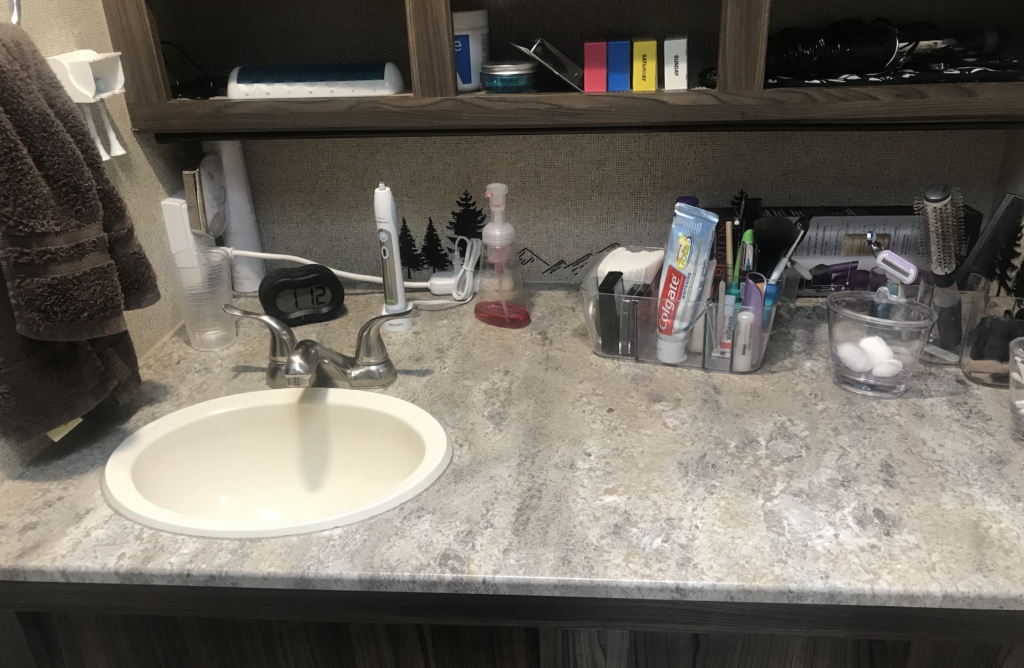

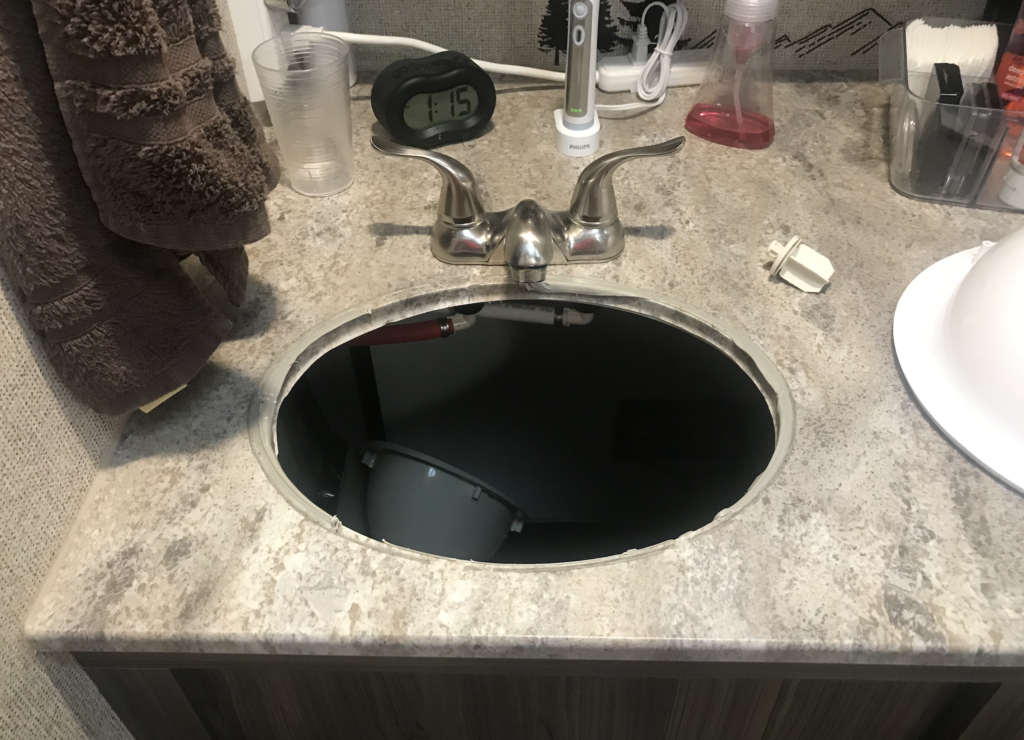
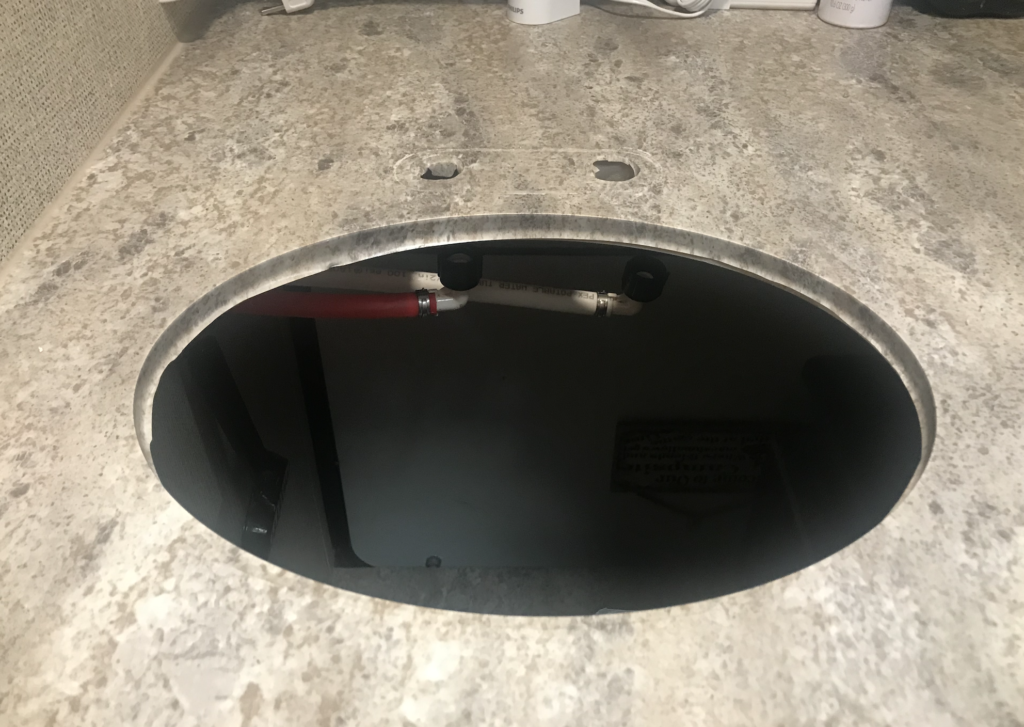


Excuse the clutter in my photos, stuff was everywhere that weekend for some reason. Regardless, the bathroom sink was a hot mess before this upgrade! Water would go everywhere when I washed my face or brushed my teeth. The faucet was too far back to get your hands underneath. This took a bit of creativity to ensure we could use the existing water lines. Fortunately, Brian found flexible connection lines at Lowe’s. Underneath our bathroom sink is the outdoor kitchen, so access to the water lines was not an issue. He used the same faucet holes and that did mean it is a bit off-center, though not obvious enough for us to care and the faucet head swivels. Using his Dremel, Brian cut the hole for the new sink to be a bit larger and he cut a notch out the sink so it is flush with the faucet. The entire project took him less than 2 hours (as seen on the clock in the photos). Below are links to the sink and faucet and a close-up of the new sink and faucet installed.

Ventilation Magic: Upgrading the Bathroom Fan
I have heard about them, I have dreamt about them, and now we own one! Haha, the Fan-tastic Vent fan seems to be a staple for many RV’s. I didn’t know what a difference they made until we upgraded.
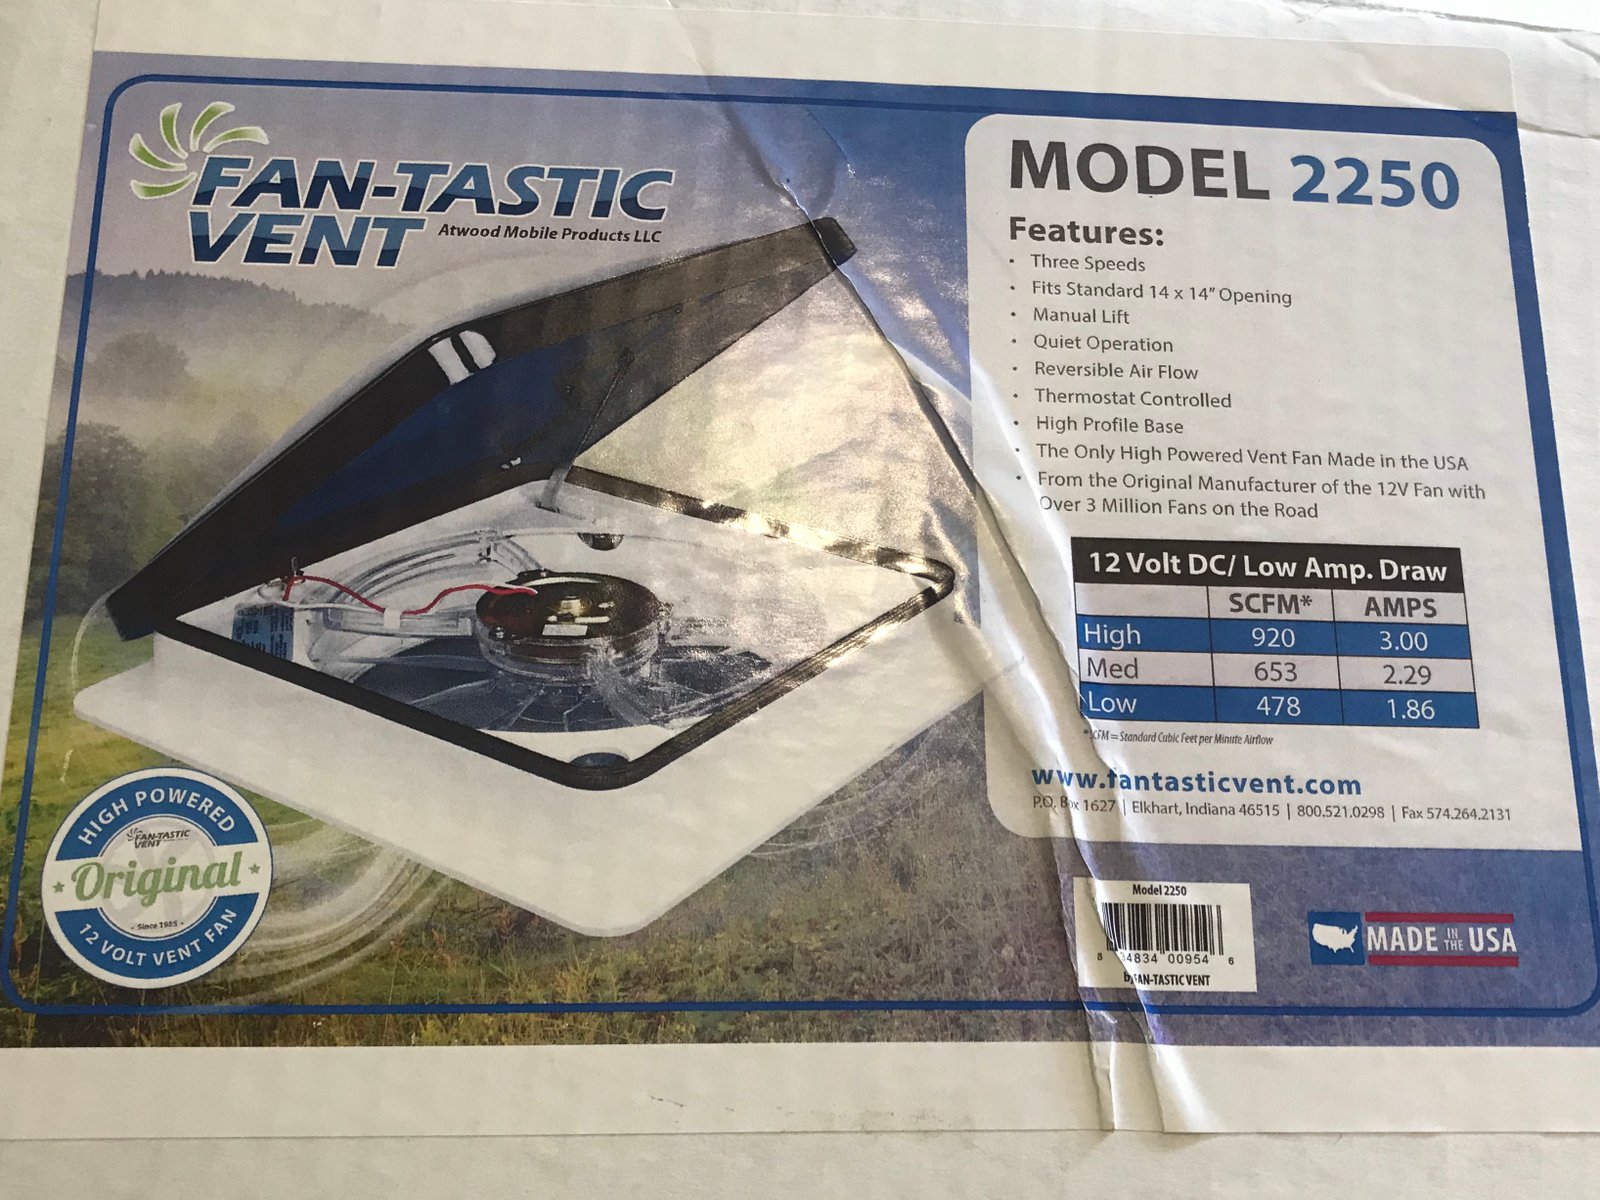

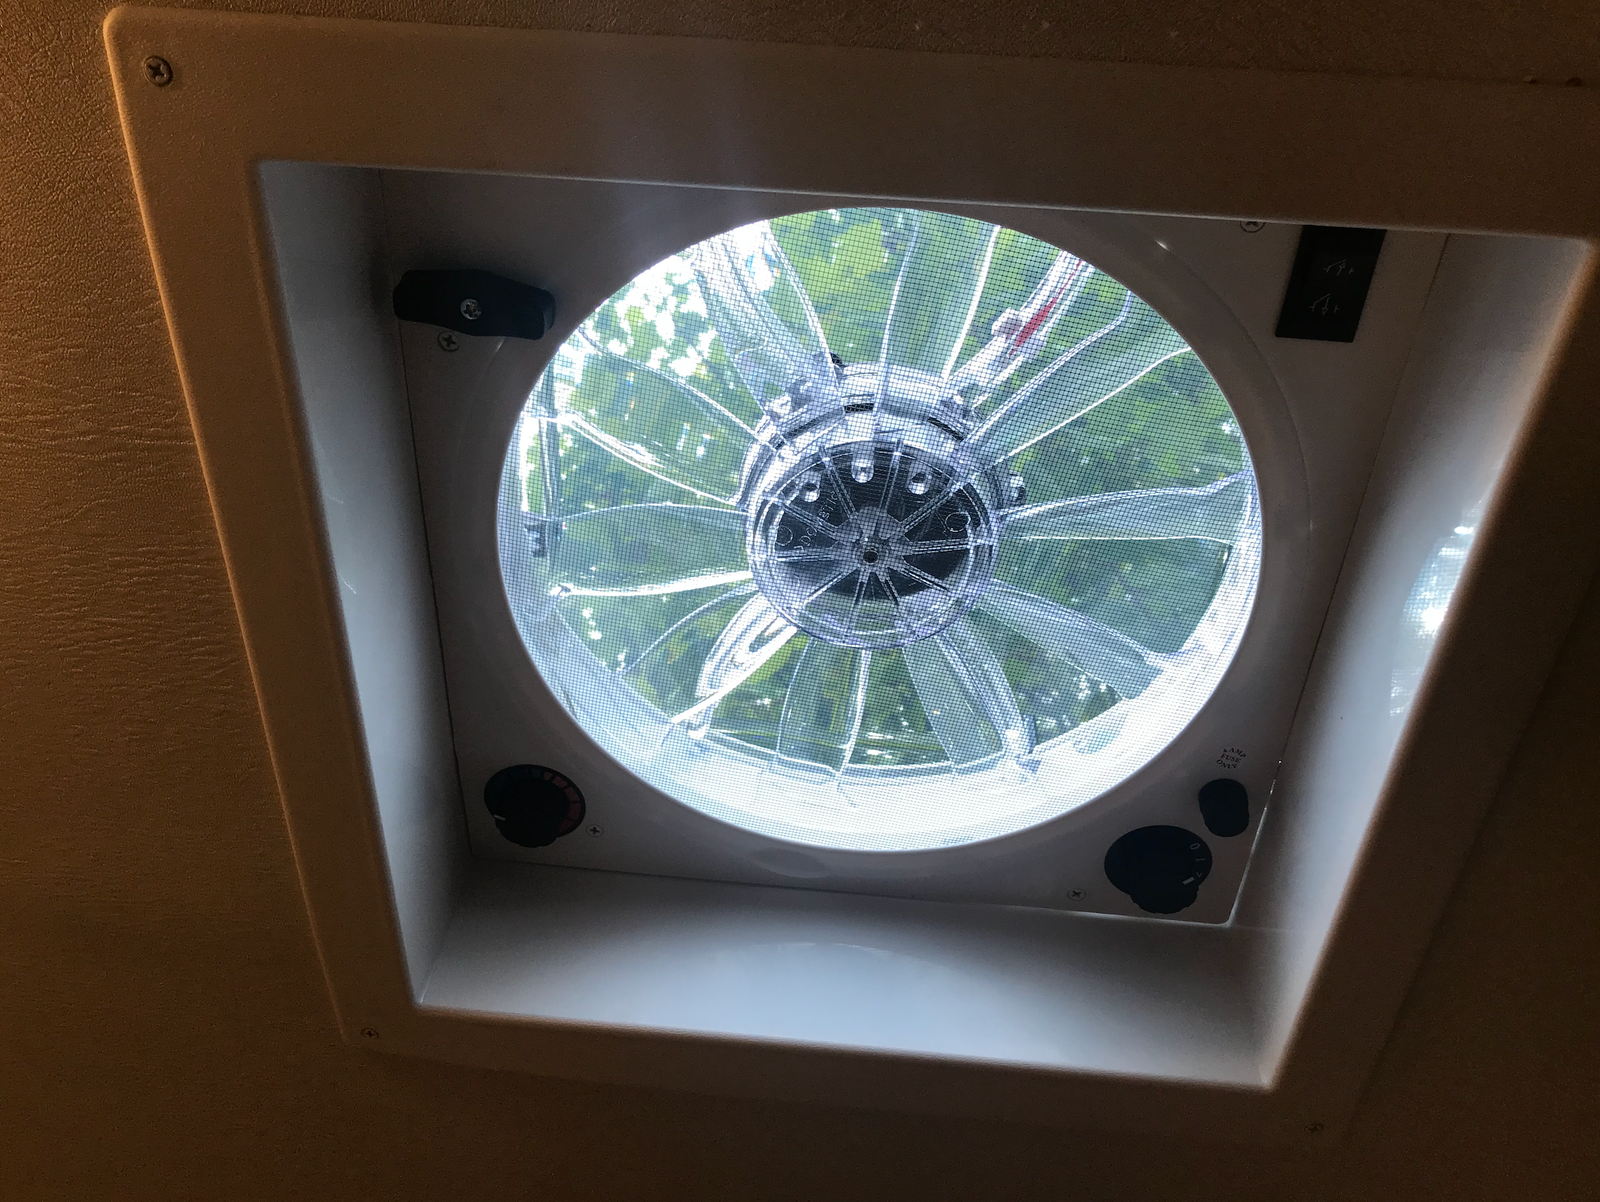

YES! This fan is amazing and super easy to install (so Brian tells me). We ordered the Fan-tastic Vent 2250 with a reverse thermostat. This is not the one with a remote or rain sensor but it will pull air in or out of the rig depending on your preference. I cannot believe how quiet this fan is; it has a lot of power and we have only used it on the low speed so far.
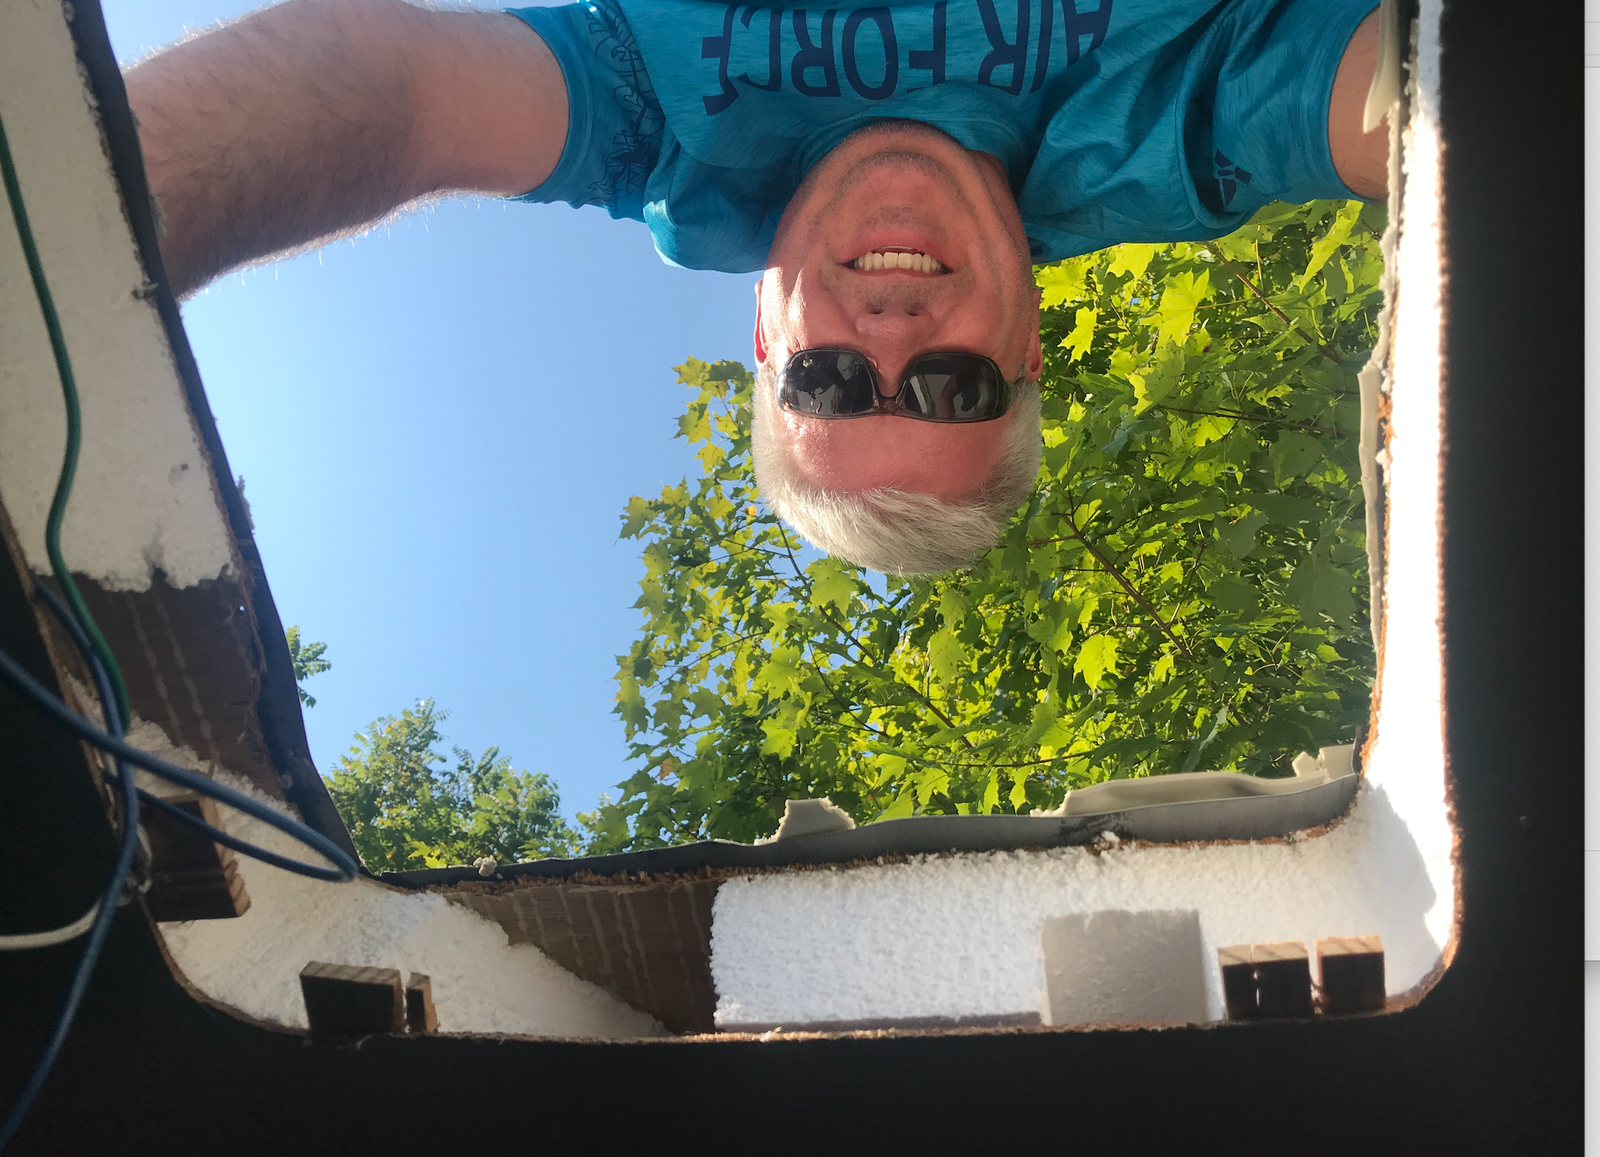
This project took about 2 hours. It made a huge mess with pieces of styrofoam insulation everywhere. We also needed to put more shims in between the styrofoam and the roof to hold the new screws in place. It is terrifying to see how little is holding up your roof, but that’s another subject, let’s just say it’s a few boards, some styrofoam, and a lot of air.
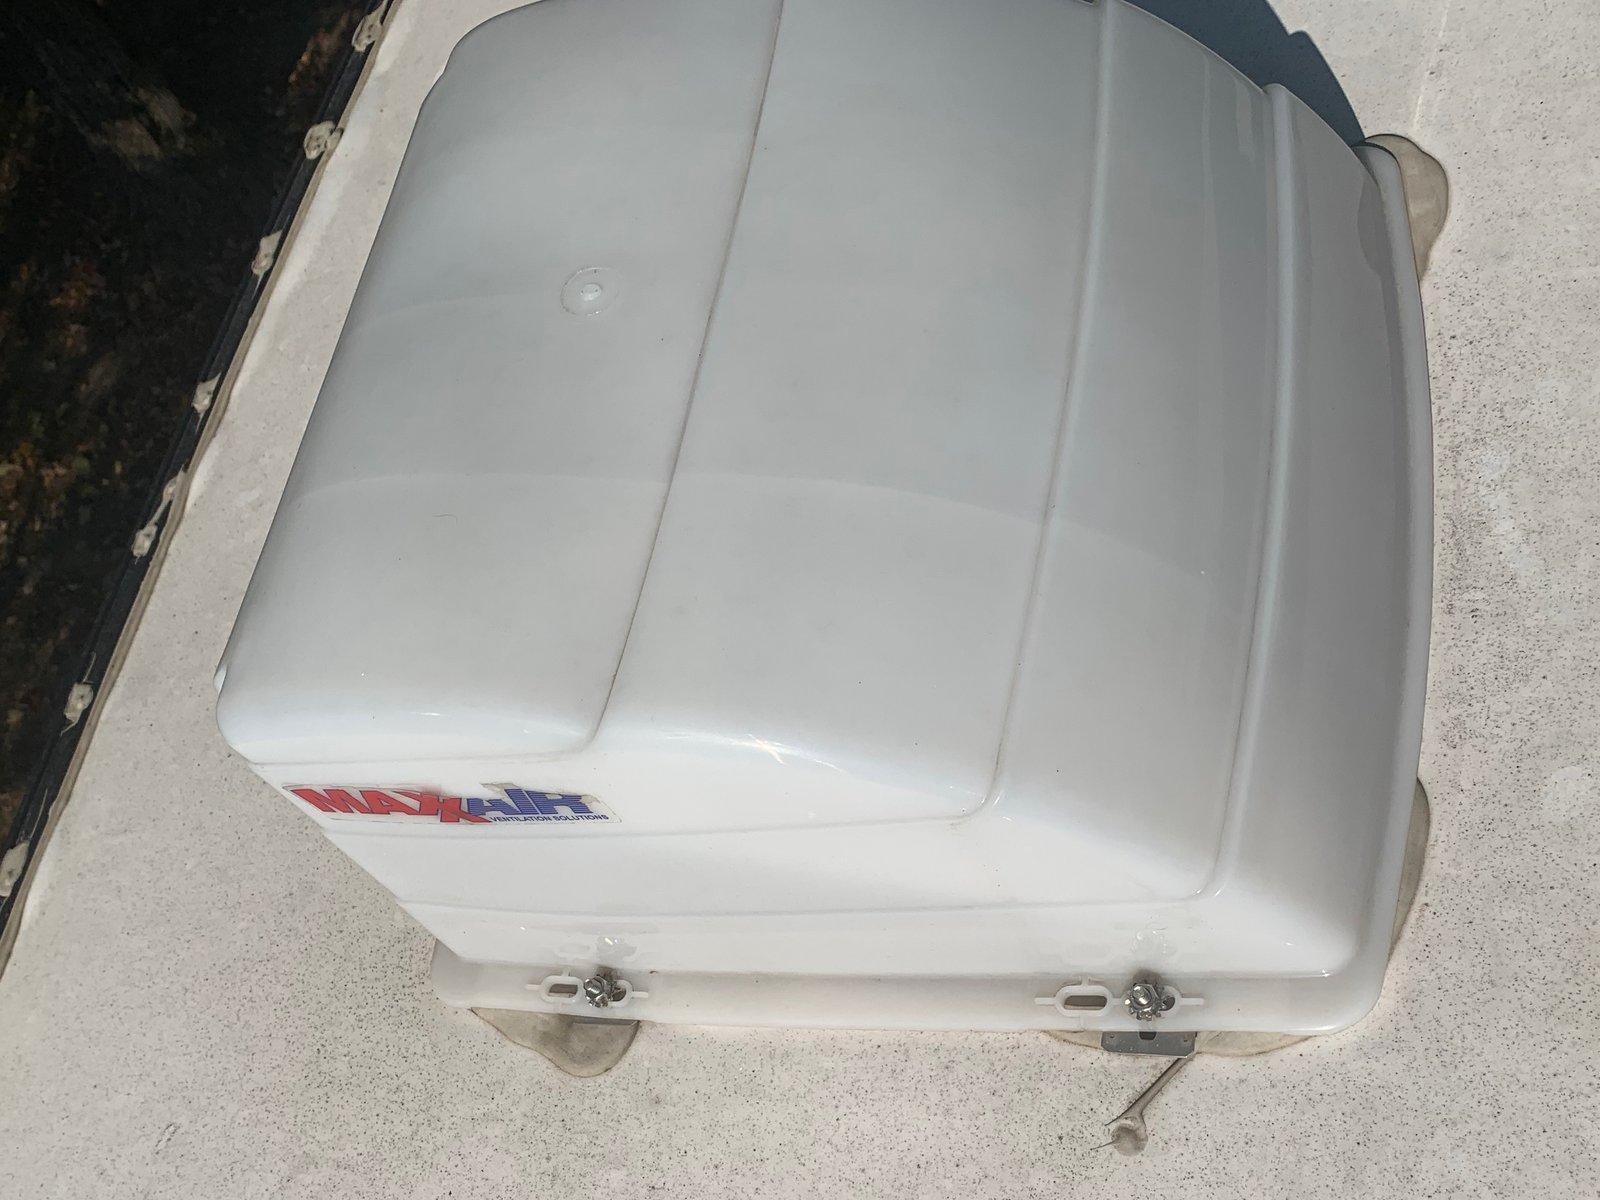
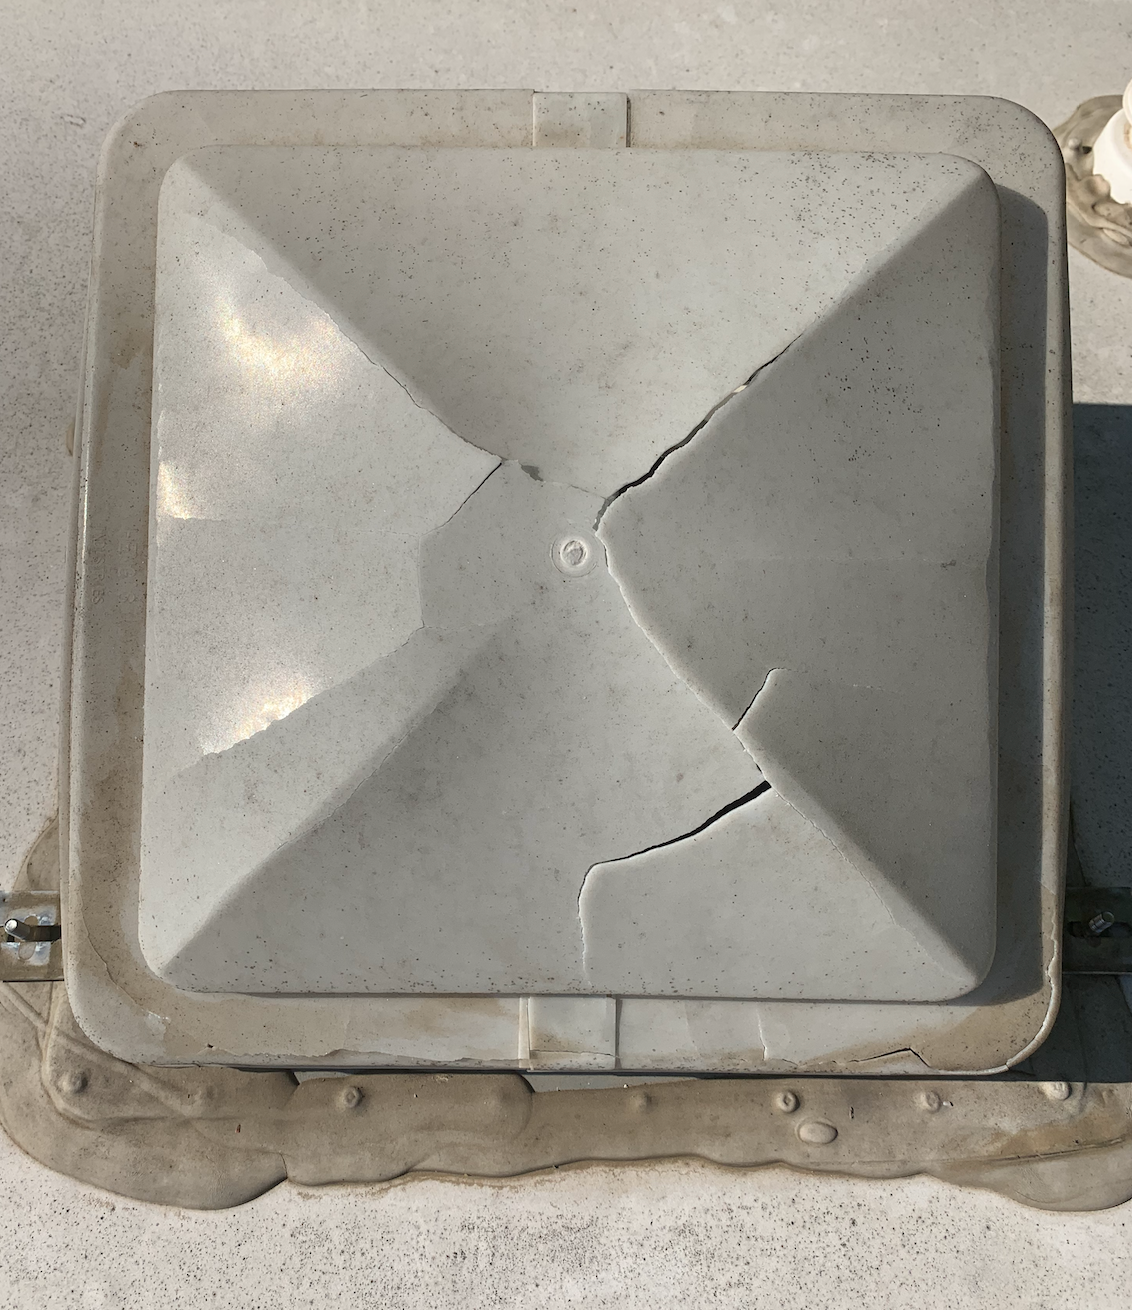
We were both surprised at how the original vent fan cover was brittle and shattered into pieces when Brian took out the fan (see pictures above). We had a Max-air cover over our vent so there was no damage to our rig, but besides UV rays there is no reason the cover should have been broken.
Speaking of covers, the Fan-tastic Vent needs a special vent cover, see the links below. We thought our Max-air cover would work but it’s too small. Next time we go out we will be installing the new vent cover that is shown below which is a very easy install. Besides wire cutters, wire nuts, and shims, all you need to make this upgrade happen is a couple of hours and what is shown below.
As I mentioned at the start of this blog, we have done a lot more RV upgrades, you can see that blog by clicking here. We also have an RV Tour (created before these upgrades) on our YouTube channel linked below.
What have you done to make your rig your own? Tell us about your upgrades or personalize tips – we love to hear them!
Until next time…
Where did you find the space savers you use for your shoe storage cart? I have looked but unable to find one that small.
We made it ourselves. Here is the link to make it: https://youtu.be/3VWWvaPntxg